

1. Hardware Installation
The extension board must be plugged on a IC2000/4000 Rev.D1 or higher, controller or on a DS216 controller.
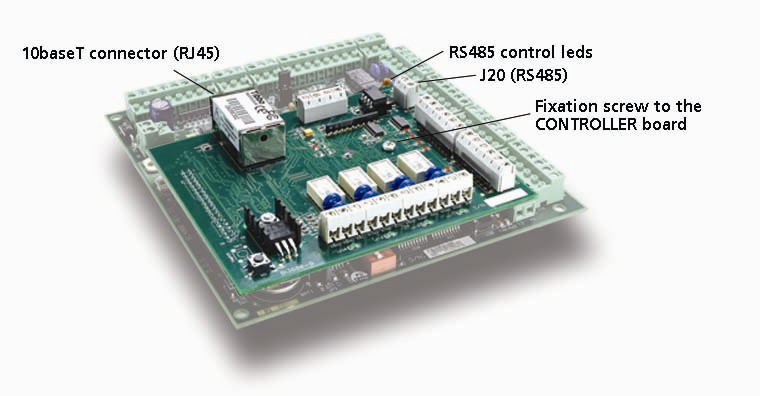
1.1. Board description (EXT-TCP-84)
1.2. Assembly instructions
- Disconnect the power from the IC controller
- Screw the supplied spacer in its emplacement in the middle mechanic hole of the controller
- Fit the supplied 2 pin green connector to J10 of the controller. It acts only as a mechanical support to the extension board
- Install the extension board to the J8 connector of the IC
- Screw the fixation screw on the corresponding hole
- Connect the different elements (inputs, relays, LAN)
- Power on the controller
1.3. TCP/IP connection (on EXT-TCPT and EXT-TCPT84)
Connect the LAN cable to the RJ45 connector.
Note: while using this board, the main RS485 port on the controller is not available. However, the RS485 bus on the extension board (connector J20) may be used to connect up to 31 other controllers, through their regular RS485 port, to this TCP/IP network. These controllers can be any one of the DDS controllers.
2. Software configuration
2.1 Setup Device Server Tool Kit (TDST)
Install the latest version of TDST. It is on the CD you got with the EXT-TCPT and also available at http://www.tibbo.com/get_dst.php
2.2. Setting the IP address
The initial (first time) IP addressing can only be done when the controlling PC (from which the settings are being sent) and the EXT-TCPT are both on the same network segment. No first-time configuration can be made when the communication is through gateways, routers, etc.
Once the controller connected through its RJ45 connector to the local segment of your LAN, go to Start-Programs-Tibbo-DS Manager.
The 'Device Server' screen should appear:
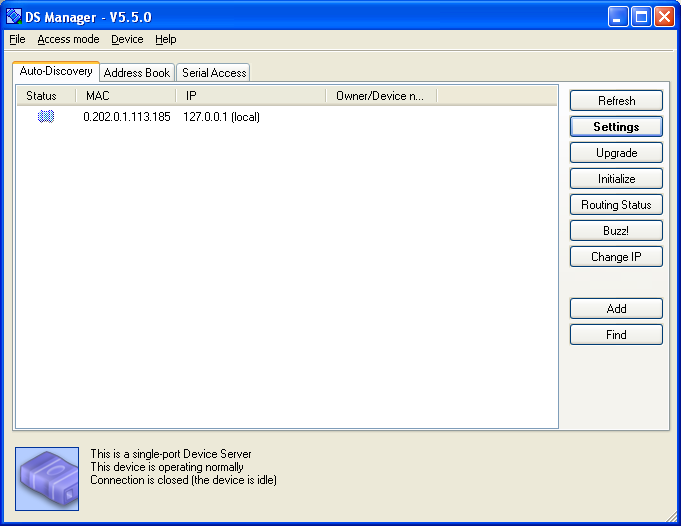
The default address, factory setting, is 127.0.0.1 or 1.0.0.1 which is not a valid IP address for your LAN.
To change the IP address, select (high-light) the line with the current IP address and click <Change IP>.
Consult the network administrator and assign the new IP.
Note: in any case, never set it to 0.0.0.0
The unit is rebooted and after few seconds the new IP will appear. In case it disappears, click Refresh.
After the assignment of the new IP the color of the icon should be solid blue. If it is pale blue it means the IP you have assigned is not a valid IP address on your network.
Other settings:
1. Run the DS manager
2. Select the board with the just defined IP address
3. Click <Settings>.
Note: if the TCP/IP interface firmware version is old, you will get a corresponding message. Click the <Skip> a few times button until the properties screen appears.
Perform the three following changes:
1. In Network Settings tab set “Transport protocol” to TCP. (Default is UDP).
2. In Serial Settings tab set the Baud Rate value to that of the controller (in GPP it appears at Tools-Options-Communication).
3. Still in Serial Properties tab set “RTS/CTS flow control” to “Disabled or remote”.
Click OK to exit the properties screen and exit the device manager program.
Comments
0 comments
Please sign in to leave a comment.