

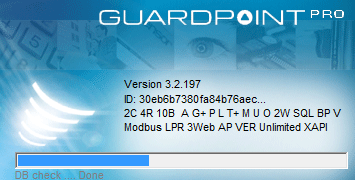
It may happen that during the GuardPoint Pro startup the dongle is not accessible and then the DEMO configuration is displayed in the splash screen as follows:
You are using a Physical dongle:
→ If using the software via the Windows Remote Desktop - this is normal. The driver of the dongle is not accessible from the Windows Remote Desktop.
If you cannot start the application from the server itself, try one of the following solutions:
1. Use another software (like Teamviewer, LogMeIn, etc.)
2. Use a virtual dongle. See https://sensoraccess.zendesk.com/hc/en-us/articles/360001054991-Changing-to-a-Virtual-License-For-GuardPoint-Pro
→ Remove the dongle and plug it in again.
The dongle must be inserted into the USB port or parallel port after the end of the complete installation of the software.
→ Reinstall the dongle driver:
1. Pull out the dongle
2. Download the HASP-HL driver of the list here (choose: Sentinel HASP/LDK Windows GUI Run-time Installer)
3. Install the driver
4. Plug in the dongle
5. Check with the UpdatePlug.exe program located in the application folder.
→ During the software installation, the following error was displayed:

1. Click on Start > Run. Enter "services.msc" and check if you have anything related to Hardlock.
If yes try to run that service manually.
2. Open the Device Manager of Windows.
In Device Manager click on View and select 'Show Hidden Devices'.
3. Expand 'Non plug and Play devices' and if you have Hardlock in the list, right click and Uninstall.
4. Run the removal tool to remove the driver completely from machine. You can download Hasp removal tool from here.
5. Once you finish removing the Hasp driver, please download and install Hasp latest driver from here.
→ Check if there are errors on the AME file at that time. If so, please contact us.
You are using a Virtual dongle:
1- Launch the UpdatePlug.exe program located in the application folder and select the "Software dongle" option.
2- Press the "Get ID and Code" button.
→ If it still displays the DEMO configuration (eg. "2C 4R 10B ..."), check that the Data.plg and Signature.plg files are located in the application server folder and the PC ID displayed in the UpdatePlug.exe corresponds to the PC ID sent to the Vendor.
→ If it displays the right configuration, check that the option "SoftwareDongle = 1" in the GuardPointPro.ini file
Comments
0 comments
Please sign in to leave a comment.