

GuardPoint Pro should be installed on the PC.
If you are using physical dongle, it should be connected in the USB port of the PC
Step 1: Send your dongle parameters to your vendor with your request
Launch the UpdatePlug.exe file in the GuardPoint Pro folder

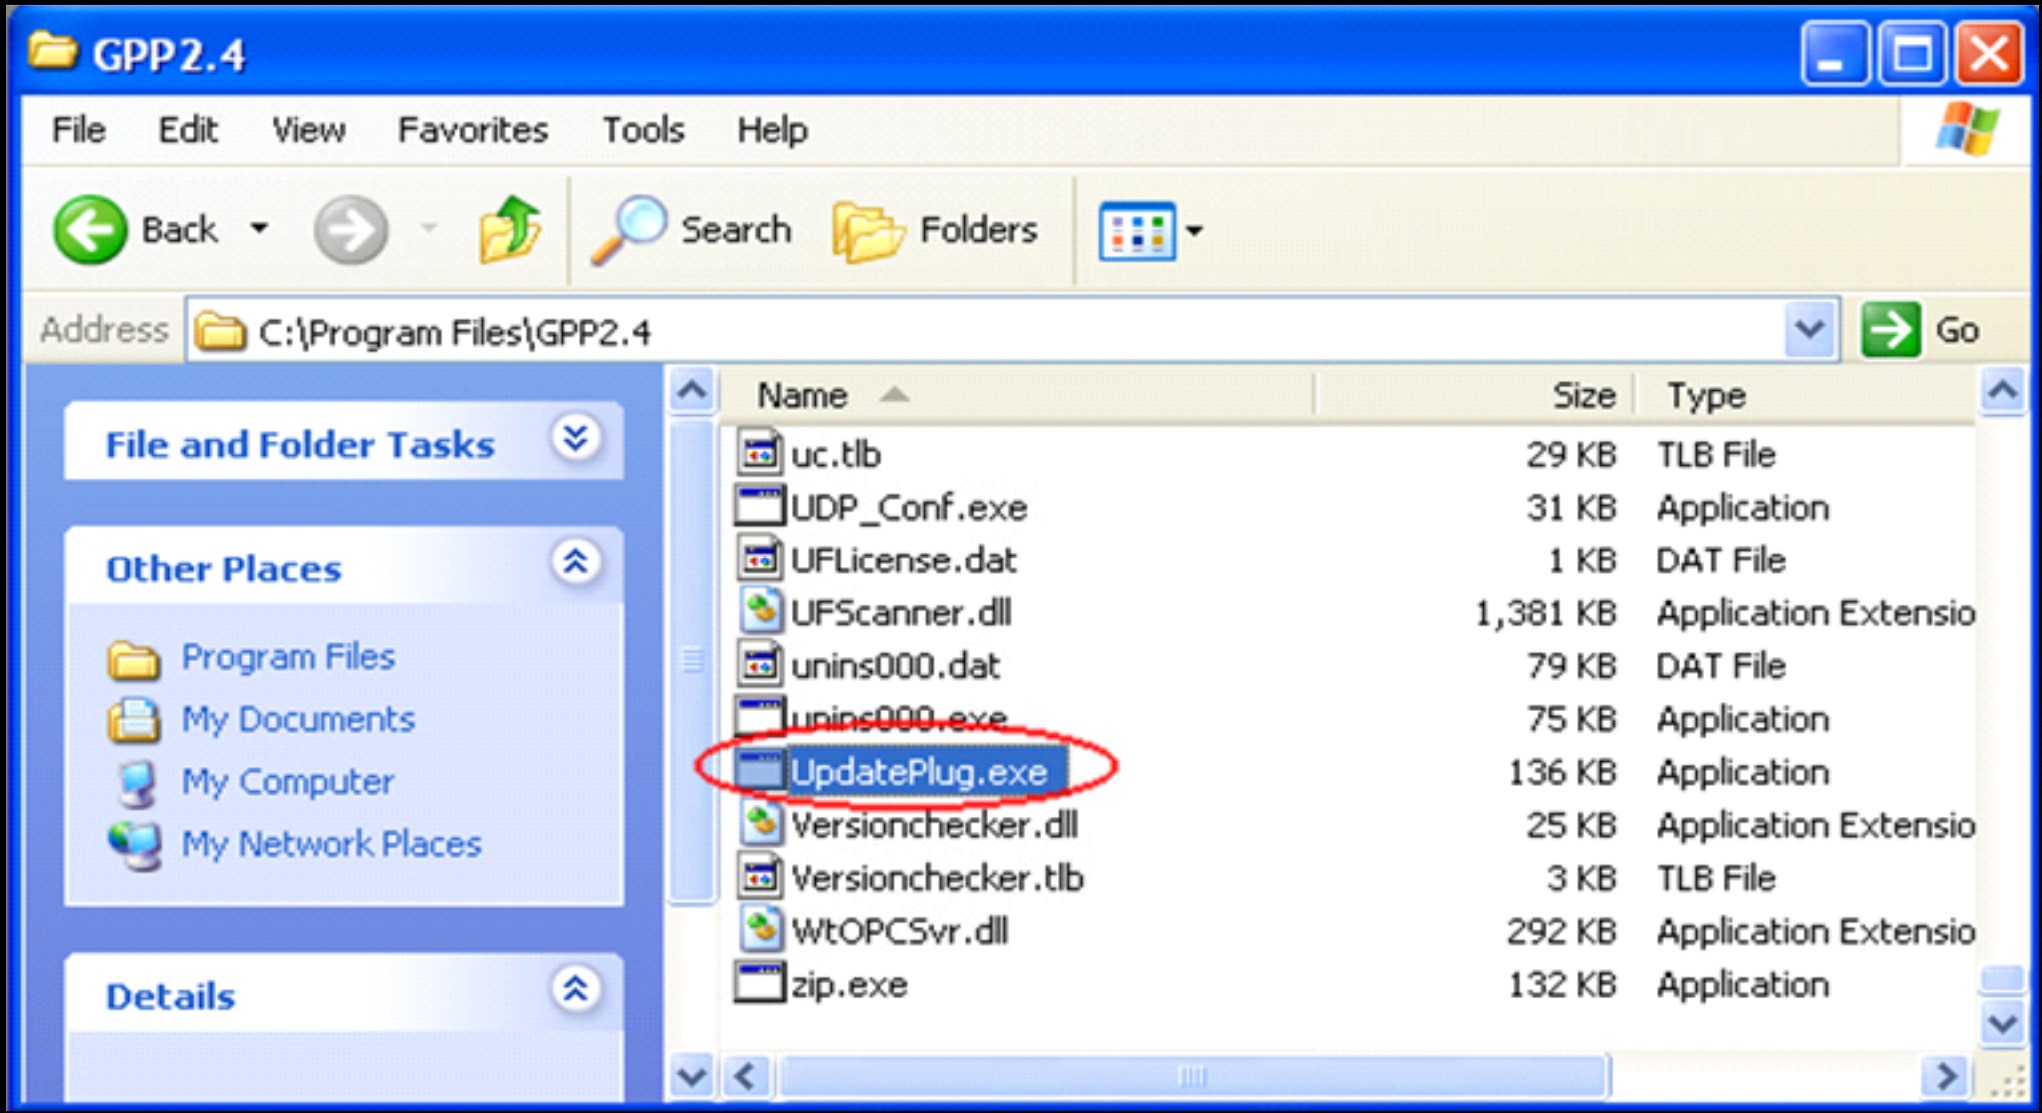
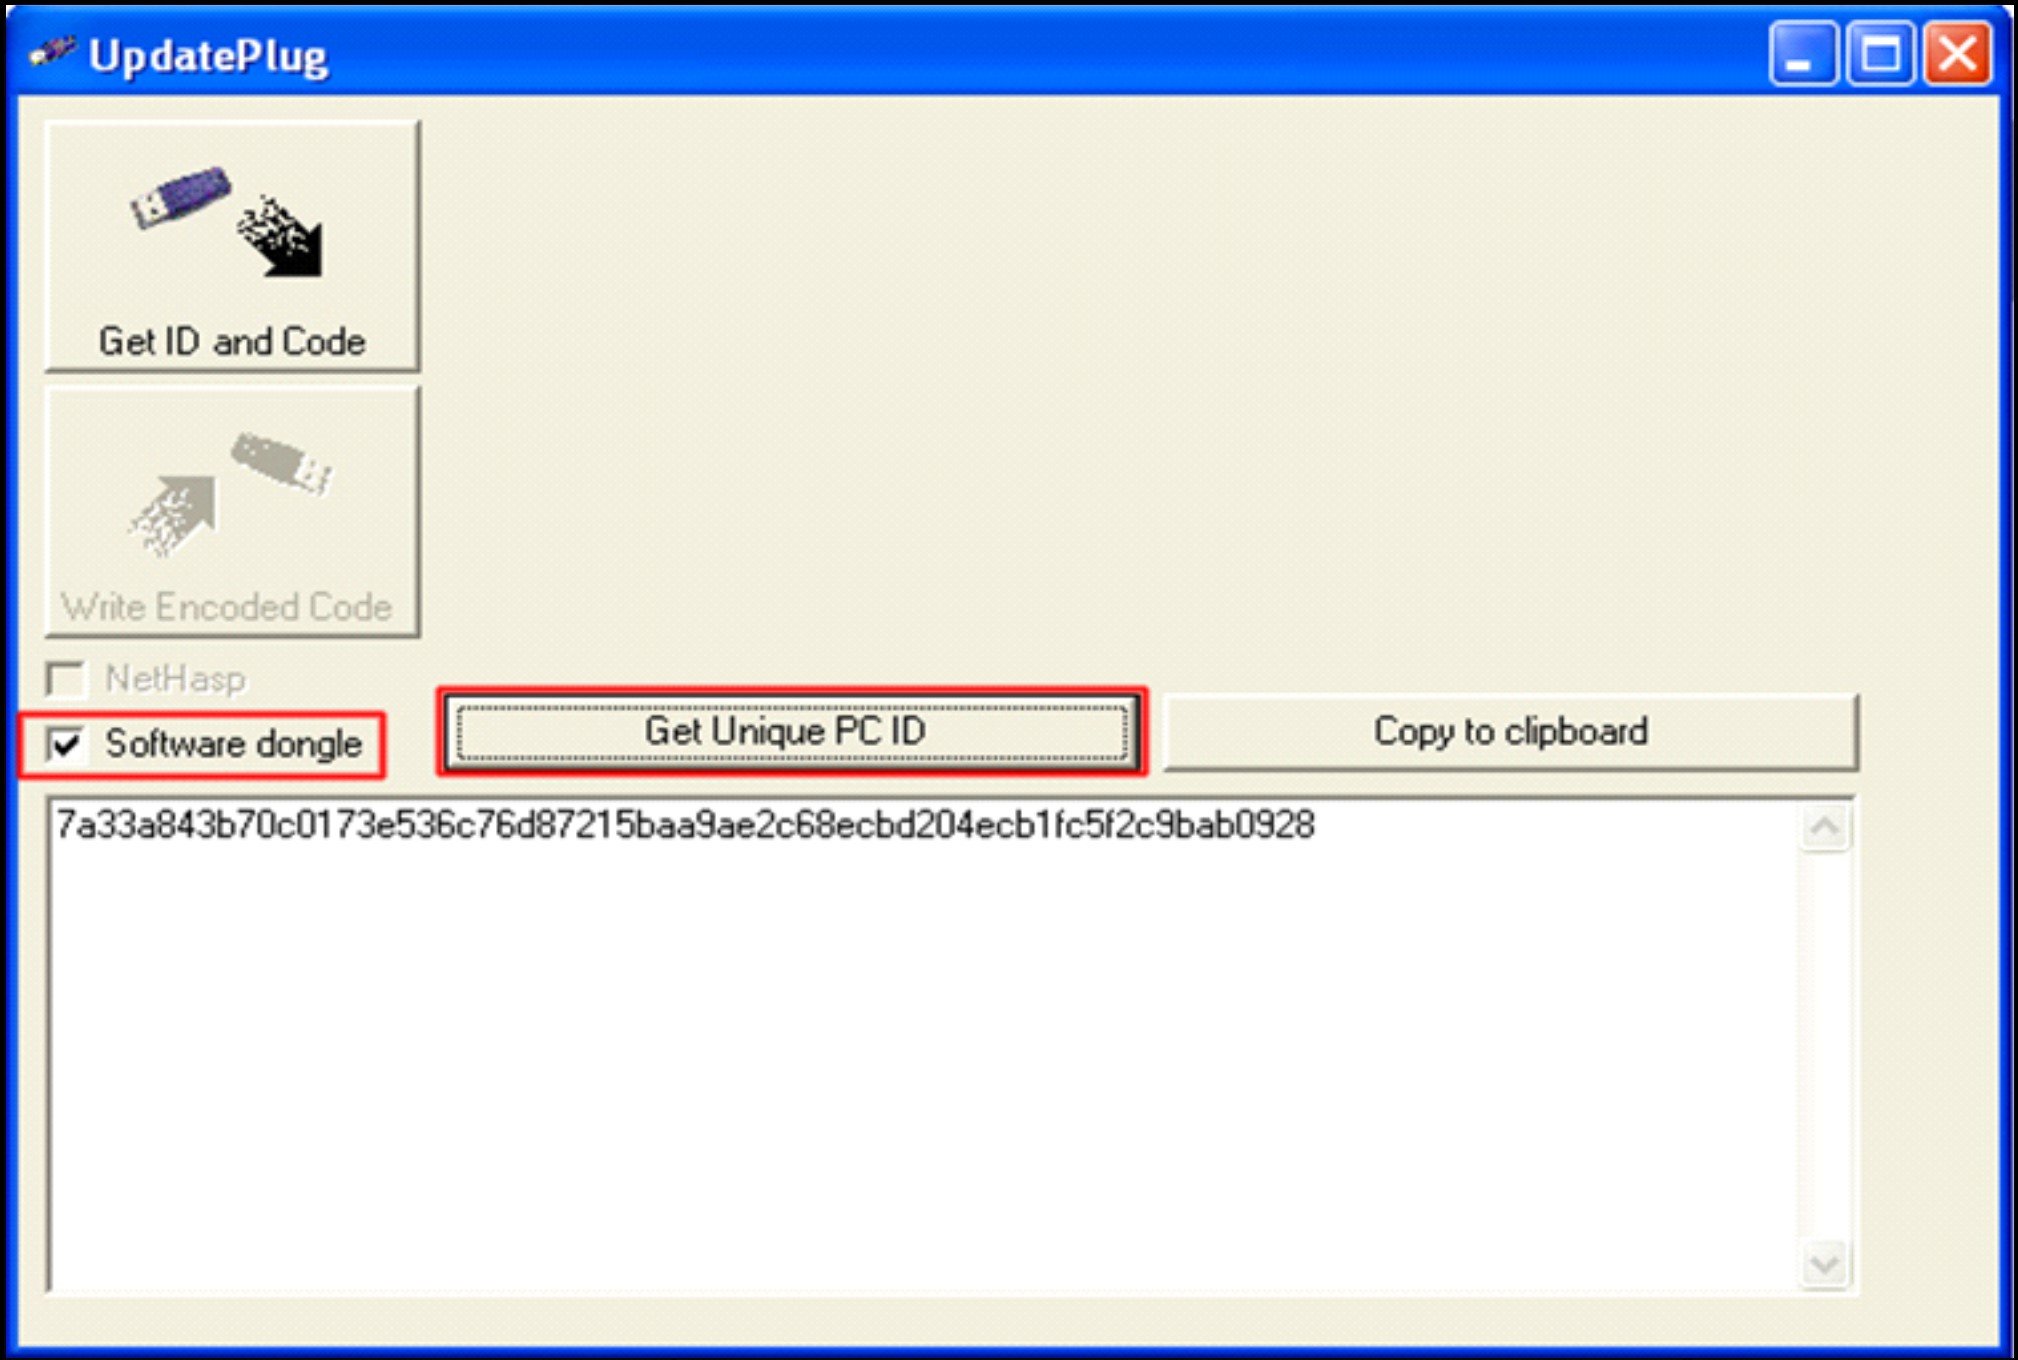
If you are using a virtual dongle, click on the "Software dongle" option.
Click on "Get ID and Code".
You should see the PC ID and the current configuration:

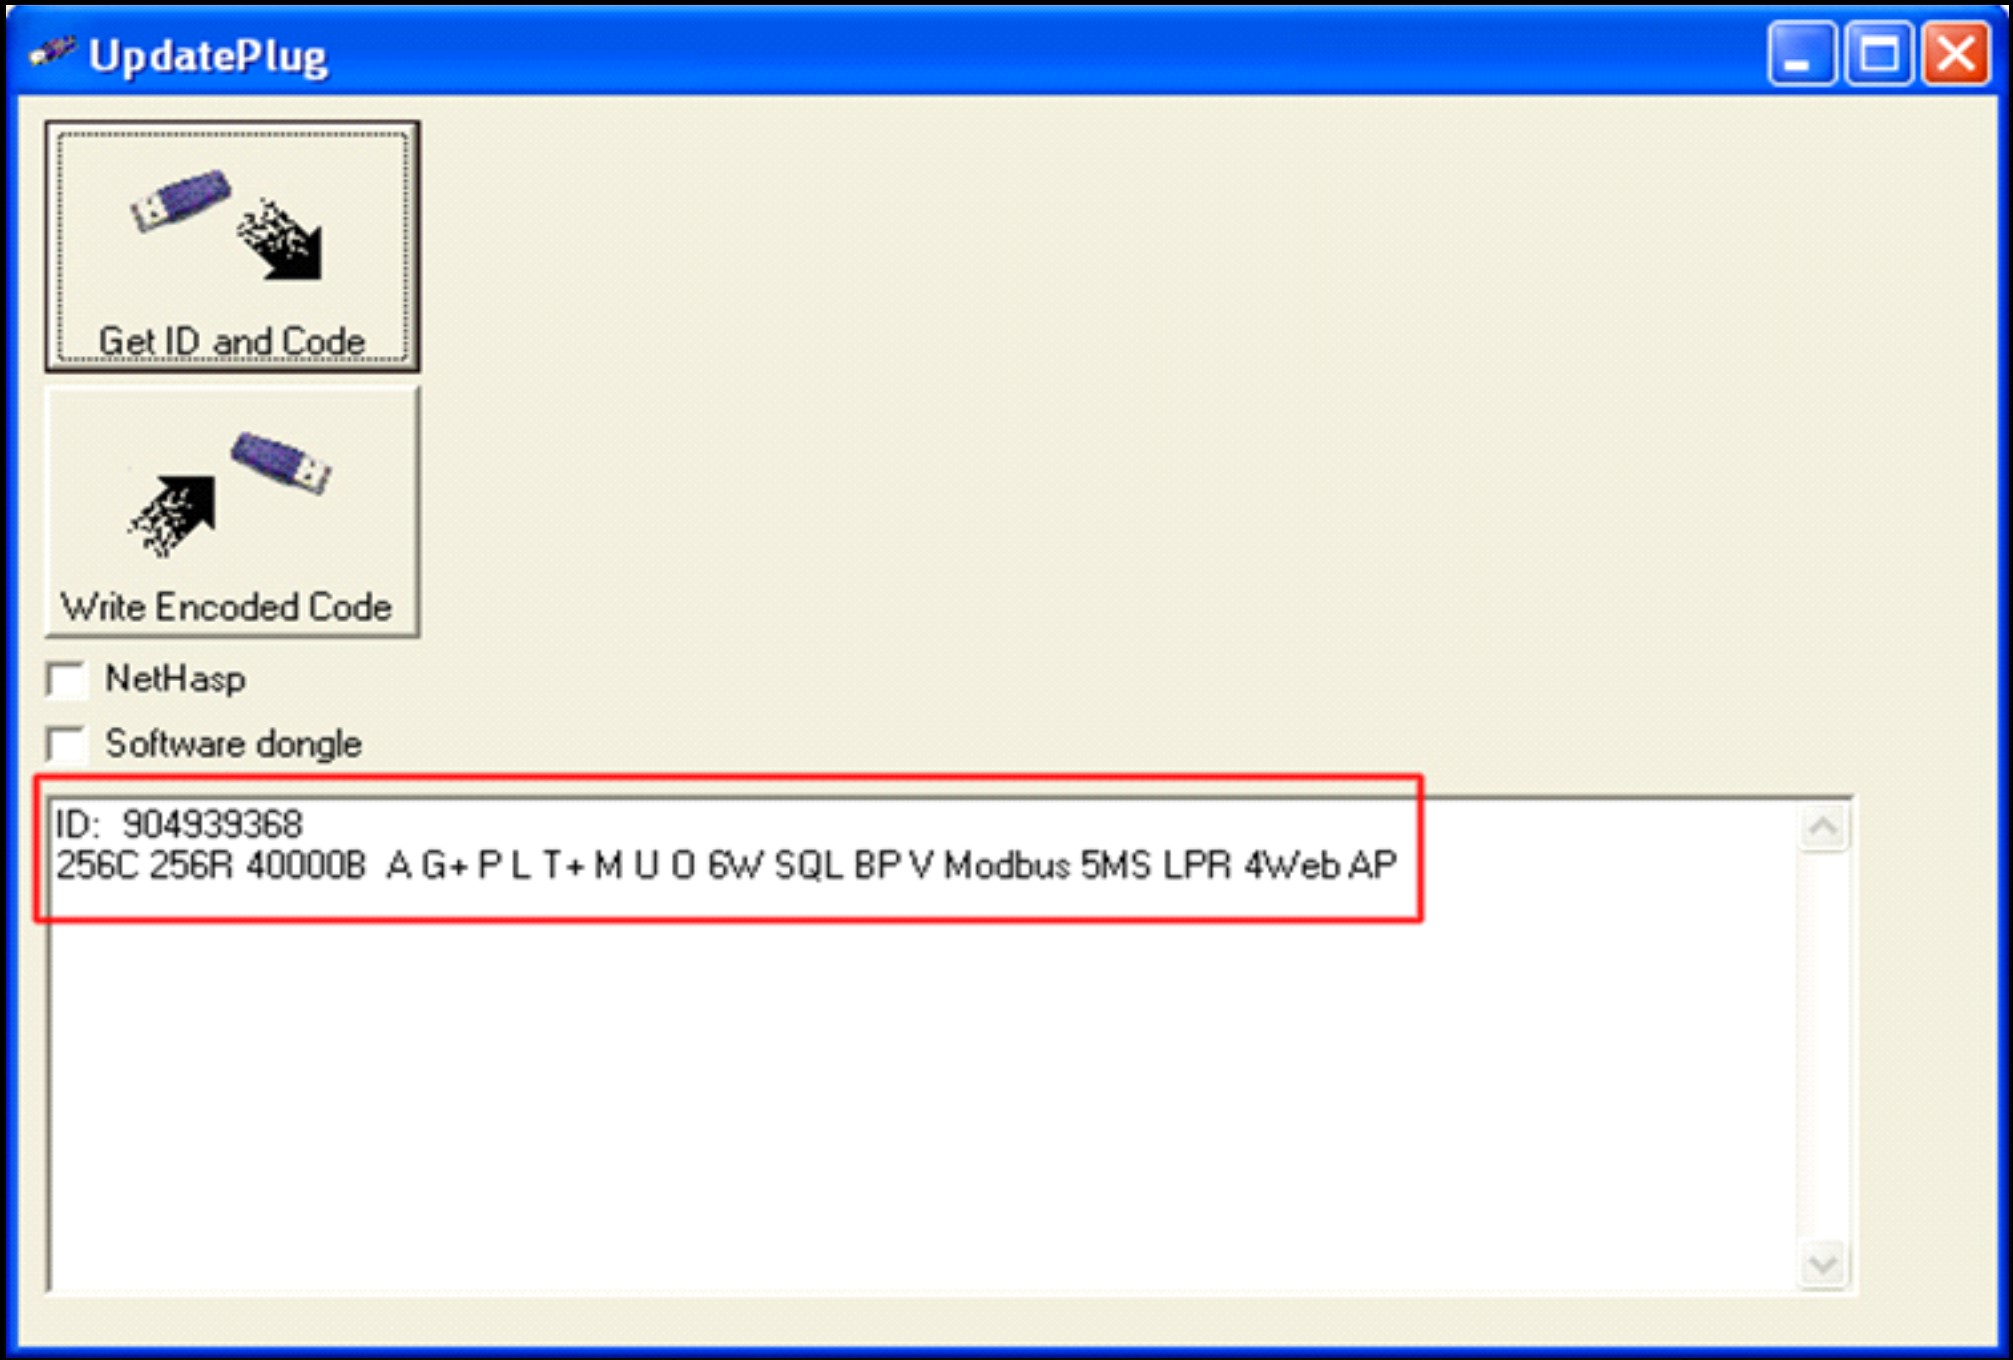
If you are using Physical dongle, click "Get ID and Code".
You should see its ID and current configuration. See example:

Once you have all the details, fill in the Dongle Upgrade form downloadable at the bottom of this article.
If the received data shows "DEMO" it means that the dongle is not connected, or that it cannot be read (could be that its drivers are not installed correctly).
If you are using NetHasp, click on this option before clicking on "Get ID and Code".
Step 2: Upgrade the dongle
1. After receiving the upgrade file from your Vendor, close GuardPoint Pro.
2. If you are using virtual Software dongle (the ini option "SoftwareDongle" should be set to 1), just place the upgrade files in the GuardPoint Pro folder, launch the UpdatePlug.exe (go to Step 6)
If you are using a physical dongle open the upgrade file sent by your vendor with Notepad and copy the upgrade string file in the GuardPoint Pro folder.


3. Launch the UpdatePlug.exe
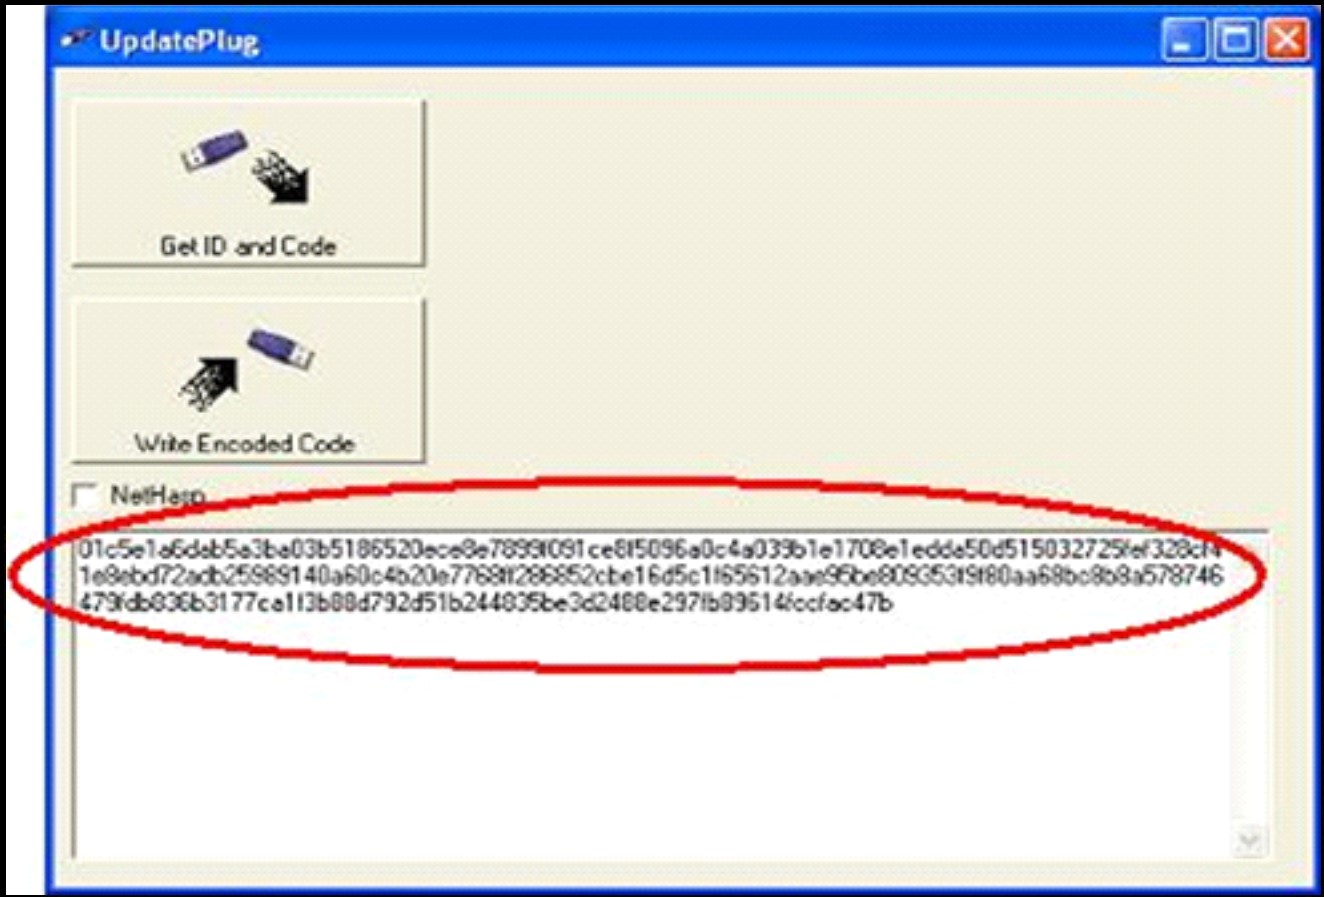
4. Paste the upgrade string in the bottom blank field

Note: If the dongle type is NetHasp, you should receive TWO upgrade strings.
Clicking the NetHasp checkbox will show 2 windows, paste each strings in each window.
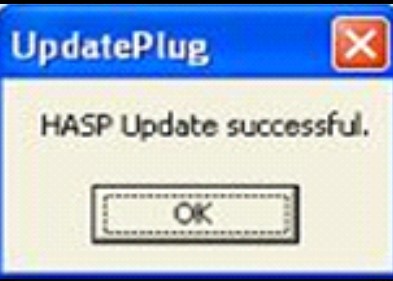
5. Click "Write Encoded Code". The following message should appear:

6. Click "Get ID and Code" and see that the dongle has been upgraded to the correct configuration according to your order.
Comments
0 comments
Please sign in to leave a comment.